Private EOS network — Part 1: Setup

Step-by-step guide for setting up a private EOS network using EOSIO 2.1
Prerequisites:
According to official docs, EOSIO 2.1 supports the following operating systems:
Linux:
- Amazon Linux 2
- CentOS Linux 8.x
- CentOS Linux 7.x
- Ubuntu 20.04
- Ubuntu 18.04
Mac OS:
- macOS 10.14 (Mojave) or later
Make sure you are running one of those and you have root access
For this article I’ve set up a t3.2xlarge EC2 instance on AWS, running Ubuntu 18.04. So, let’s ssh to our server and get started.
Step 1: Installing EOSIO pre-built binaries
It’s always a good idea to start with
sudo apt updateThen, download the correct binaries for your OS. For Ubuntu 18.04 you can use the command:
wget https://github.com/eosio/eos/releases/download/v2.1.0/eosio_2.1.0-1-ubuntu-18.04_amd64.debYou will find the list of all available releases on GitHub
Install EOSIO (again, the installer will have a different filename for different OS):
sudo apt install ./eosio_2.1.0-1-ubuntu-18.04_amd64.debVerify that everything went fine:
ubuntu@server:~$ nodeos -vThe output should be:
v2.1.0Step 2: Install EOSIO Contract Development Toolkit
The next step is installing the Contract Development Toolkit — EOSIO.CDT v1.8.1 — you’ll find download URLs on GitHub
wget https://github.com/EOSIO/eosio.cdt/releases/download/v1.8.1/eosio.cdt_1.8.1-1-ubuntu-18.04_amd64.deband install it:
sudo apt install ./eosio.cdt_1.8.1-1-ubuntu-18.04_amd64.debStep 3: Create Development Wallet
The next step is creating our development wallet:
cleos wallet create --to-consoleYou will see the following output:
"/usr/opt/eosio/2.1.0/bin/keosd" launched
Creating wallet: default
Save password to use in the future to unlock this wallet.
Without password imported keys will not be retrievable.
"PW......"
Of course, you can customize your wallet name and output password in a file instead of the console. E.g. running:
cleos wallet create -n levan -f levan.pwdwill create a wallet named levan and password will be saved in a file levan.pwd
After creating a wallet if you run
cleos wallet listyou will see the following output:
Wallets:
[
  "default *"
]
An asterisk next to the wallet name means that the wallet is unlocked. You can lock the wallet by running
cleos wallet lockand unlock it again by
cleos wallet unlock(this will prompt your wallet password)
Now, let’s create new private/public keypair and import them into our wallet:
cleos create key --to-consoleyou’ll see Private and Public keys in the console — something like this:
Private key: 5JtMzDTd4gnYRxBCLsmujysgKygk99VjtfGuBNau1x1VsKBp7Fj
Public key: EOS6XLDpeALieoCa4jUnWHdW86phVf3xsstny6NLWfuca1yFJ83ah
you must NEVER share your private key with anyone, and you must save them SECURELY. Since this is a tutorial, I don’t mind sharing them here 😀
Now, let’s import that key in the wallet:
cleos wallet importAfter importing the key you’ll get the following message:
private key: imported private key for: EOS6XLDpeALieoCa4jUnWHdW86phVf3xsstny6NLWfuca1yFJ83ahStep 4: Prepare files and directories:
After playing with cleos it’s time to create directories and files for our node. Let’s say we will run our genesis node in ~/eos/genesis :
cd ~
mkdir eos
cd eos
mkdir genesis
cd genesis
now, create a genesis.json file in eos directory.
cd ~/eos
touch genesis.json
nano genesis.json
paste following content in genesis.json :
{
  "initial_timestamp": "2018-12-05T08:55:11.000",
  "initial_key": "EOS_PUB_DEV_KEY",
  "initial_configuration": {
    "max_block_net_usage": 1048576,
    "target_block_net_usage_pct": 1000,
    "max_transaction_net_usage": 524288,
    "base_per_transaction_net_usage": 12,
    "net_usage_leeway": 500,
    "context_free_discount_net_usage_num": 20,
    "context_free_discount_net_usage_den": 100,
    "max_block_cpu_usage": 100000,
    "target_block_cpu_usage_pct": 500,
    "max_transaction_cpu_usage": 50000,
    "min_transaction_cpu_usage": 100,
    "max_transaction_lifetime": 3600,
    "deferred_trx_expiration_window": 600,
    "max_transaction_delay": 3888000,
    "max_inline_action_size": 4096,
    "max_inline_action_depth": 4,
    "max_authority_depth": 6
  },
  "initial_chain_id": "0000000000000000000000000000000000000000000000000000000000000000"
}
Make sure you replace EOS_PUB_DEV_KEY with the development key created in the previous step
Save and exit editor — reminder — [CTRL] + O and then [Enter] — will write out genesis.json file, [CTRL] + X will exit nano editor.
Checkpoint — let’s make sure we have directory structure set up properly:
cd ~/eos
ls -Alhr --time-style=+""
should give you the following output:
total 8.0K
-rw-rw-r-- 1 ubuntu ubuntu  904  genesis.json
drwxrwxr-x 2 ubuntu ubuntu 4.0K  genesis
Let’s move on to creating a bunch of shell executable files in genesis directory:
Prepare genesis_start.sh — this will be used to start our genesis node
cd ~/eos/genesis
nano genesis_start.sh
paste following into the newly created file:
#!/bin/bash
DATADIR="./blockchain"

if [ ! -d $DATADIR ]; then
  mkdir -p $DATADIR;
fi

nodeos \
--genesis-json $DATADIR"/../../genesis.json" \
--signature-provider EOS_PUB_DEV_KEY=KEY:EOS_PRIV_DEV_KEY \
--plugin eosio::producer_plugin \
--plugin eosio::producer_api_plugin \
--plugin eosio::chain_plugin \
--plugin eosio::chain_api_plugin \
--plugin eosio::http_plugin \
--plugin eosio::history_api_plugin \
--plugin eosio::history_plugin \
--data-dir $DATADIR"/data" \
--blocks-dir $DATADIR"/blocks" \
--config-dir $DATADIR"/config" \
--producer-name eosio \
--http-server-address 127.0.0.1:8888 \
--p2p-listen-endpoint 127.0.0.1:9010 \
--access-control-allow-origin=* \
--contracts-console \
--http-validate-host=false \
--verbose-http-errors \
--enable-stale-production \
--p2p-peer-address localhost:9011 \
--p2p-peer-address localhost:9012 \
>> $DATADIR"/nodeos.log" 2>&1 & \
echo $! > $DATADIR"/eosd.pid"
make sure you replace EOS_PUB_DEV_KEY and EOS_PRIV_DEV_KEYwith public and private keys created in step 3.
You’ll notice that this command sets p2p peer addresses — those are not set up yet, but that won’t be a problem
Save file and exit nano — [CTRL + O] , enter , [CTRL+X]
Let’s create another file — which will stop nodeos :
cd ~/eos/genesis
nano stop.sh
paste the following:
#!/bin/bash
DATADIR="./blockchain/"

if [ -f $DATADIR"/eosd.pid" ]; then
pid=`cat $DATADIR"/eosd.pid"`
echo $pid
kill $pid
rm -r $DATADIR"/eosd.pid"
echo -ne "Stoping Node"
while true; do
[ ! -d "/proc/$pid/fd" ] && break
echo -ne "."
sleep 1
done
echo -ne "\rNode Stopped. \n"
fi
save and exit nano.
You’ll notice that in genesis_start.sh we specified --genesis-json parameter. Once nodeos initializes the blockchain database and starts producing blocks, that genesis_start.sh will be useless for starting nodeos again. So, let’s create start.sh file, which we’ll use to start the genesis node after the first run.
cd ~/eos/genesis
nano start.sh
and paste the following content:
#!/bin/bashDATADIR="./blockchain"nodeos \
--signature-provider EOS6XLDpeALieoCa4jUnWHdW86phVf3xsstny6NLWfuca1yFJ83ah=KEY:5JtMzDTd4gnYRxBCLsmujysgKygk99VjtfGuBNau1x1VsKBp7Fj \
--plugin eosio::producer_plugin \
--plugin eosio::producer_api_plugin \
--plugin eosio::chain_plugin \
--plugin eosio::chain_api_plugin \
--plugin eosio::http_plugin \
--plugin eosio::history_api_plugin \
--plugin eosio::history_plugin \
--data-dir $DATADIR"/data" \
--blocks-dir $DATADIR"/blocks" \
--config-dir $DATADIR"/config" \
--producer-name eosio \
--http-server-address 127.0.0.1:8888 \
--p2p-listen-endpoint 127.0.0.1:9010 \
--access-control-allow-origin=* \
--contracts-console \
--http-validate-host=false \
--verbose-http-errors \
--enable-stale-production \
--p2p-peer-address localhost:9011 \
--p2p-peer-address localhost:9012 \
--p2p-peer-address localhost:9013 \
>> $DATADIR"/nodeos.log" 2>&1 & \
echo $! > $DATADIR"/eosd.pid"
save and exit nano.
and finally, let’s create clear.sh script, which will simply erase all the data — that will be useful if we want to start fresh:
nano clear.shand paste the following:
#!/bin/bash
rm -fr blockchain
ls -al
save nano and exit.
Finally, let’s chmod all our executables:
cd ~/eos/genesis
chmod 755 *.sh
Checkpoint: let’s make sure we have all files set up properly:
cd ~/eos
ls -RAlhr --time-style=+""
should give us the following output:
total 8.0Ktotal 8.0K-rw-rw-r-- 1 ubuntu ubuntu  904  genesis.json
drwxrwxr-x 2 ubuntu ubuntu 4.0K  genesis./genesis:total 16K-rwxr-xr-x 1 ubuntu ubuntu  281  stop.sh
-rwxr-xr-x 1 ubuntu ubuntu  922  start.sh
-rwxr-xr-x 1 ubuntu ubuntu 1021  genesis_start.sh
-rwxr-xr-x 1 ubuntu ubuntu   37  clear.sh
Okay — now we are ready to start our chain:
cd ~/eos/genesis
./genesis_start.sh
rush into blockchain directory and check out nodeos.log file:
cd ~/eos/genesis/blockchain
tail -f nodeos.log
if everything went well, you should see that nodeos is running and new blocks are produced:
...info 2022-02-06T22:24:03.901 nodeos producer_plugin.cpp:2333 produce_block ] Produced block 5604a533b6a34d3c... #363 @ 2022-02-06T22:24:04.000 signed by eosio [trxs: 0, lib: 362, confirmed: 0]info 2022-02-06T22:24:04.400 nodeos producer_plugin.cpp:2333 produce_block ] Produced block 27f155791ccf3768... #364 @ 2022-02-06T22:24:04.500 signed by eosio [trxs: 0, lib: 363, confirmed: 0]info 2022-02-06T22:24:04.900 nodeos producer_plugin.cpp:2333 produce_block ] Produced block 48f7cbe496d0022c... #365 @ 2022-02-06T22:24:05.000 signed by eosio [trxs: 0, lib: 364, confirmed: 0]...
Step 5: Create system accounts:
We need the following system accounts
eosio.bpay
eosio.msig
eosio.names
eosio.ram
eosio.ramfee
eosio.saving
eosio.stake
eosio.token
eosio.vpay
eosio.rex
to make things easy — let’s use the same keys for all of them.
cleos create key --to-consolesave generated keys in a safe place and then
cleos wallet import --private-keypaste generated private key once prompted and you should see something like this:
private key: imported private key for: EOS6AM6LW3sbeJctXe43cBB7i7khUA3oMoXGisZHXhjKk2rxQ4rQtnow, create all the accounts listed above:
cleos create account eosio eosio.bpay EOS6AM6LW3sbeJctXe43cBB7i7khUA3oMoXGisZHXhjKk2rxQ4rQt(don’t forget to replace the public key EOS6AM6LW3sbeJctXe43cBB7i7khUA3oMoXGisZHXhjKk2rxQ4rQt with the one you generated)
You should see the output similar to this:
executed transaction: 10bbb0781d618ff8a5a885c43540edacb8baf5d24d5a724fb6f4bc6ad7ffdfdb 200 bytes 227 us# eosio <= eosio::newaccount {"creator":"eosio","name":"eosio.bpay","owner":{"threshold":1,"keys":[{"key":"EOS6AM6LW3sbeJctXe43cB...warning: transaction executed locally, but may not be confirmed by the network yet ]
now, repeat this for all accounts in the list
eosio.bpay
eosio.msig
eosio.names
eosio.ram
eosio.ramfee
eosio.saving
eosio.stake
eosio.token
eosio.vpay
eosio.rex
Step 6: Build the system contracts
If we want to have a functional EOSIO chain, we need the following system contracts: eosio.system , eosio.msig , eosio.token and eosio.boot . You’ll find the first three of those in eosio.contracts repository, and eosio.boot in eos repository.
Before we build anything, we need to make sure we have something to build with:
sudo apt-get install build-essential cmakeLet’s start with eosio.contracts repo:
cd ~
git clone https://github.com/EOSIO/eosio.contracts.git
cd eosio.contracts/
git checkout release/1.9.x
and run build.sh :
./build.shAfter lots of warnings, you should see something similar:
[100%] Linking CXX executable eosio.system.wasm
[100%] Built target eosio.system
[ 77%] No install step for 'contracts_project'
[ 88%] No test step for 'contracts_project'
[100%] Completed 'contracts_project'
[100%] Built target contracts_project
let’s make sure our build/contracts directory has everything we need:
cd ~/eosio.contracts/build/contracts
ls -RAlhr --time-style=+""
and make sure eosio.token , eosio.system , eosio.msig directories have wasm and abi files.
Next — let’s build eosio.boot :
cd ~/
mkdir source
cd source
git clone https://github.com/EOSIO/eos.git
cd eos
git checkout release/2.1.x
cd contracts/contracts/eosio.boot/
mkdir build
cd build
cmake ..
make
you should see something similar at the end of the output:
-- Build files have been written to: /home/ubuntu/source/eos/contracts/contracts/eosio.boot/buildIf you followed the same folder structure like me, you should have contracts built in ~/eosio.contracts/build/contracts directory and eosio.boot built in ~/source/eos/contracts/contracts/eosio.boot/build . I’ll refer to contracts one as EOSIO_CONTRACTS_DIR and boot as EOSIO_BOOT_DIR
Step 7: Deploy contracts
Let’s start with eosio.token
cleos set contract eosio.token ~/eosio.contracts/build/contracts/eosio.tokenthe output should look similar to this:
Reading WASM from /home/ubuntu/eosio.contracts/build/contracts/eosio.token/eosio.token.wasm...Publishing contract...executed transaction: ba3d2cf5580017e6347779ae08e57386c3cf4deca164ee3d3f424a121178c1ce 19368 bytes 2817 us# eosio <= eosio::setcode {"account":"eosio.token","vmtype":0,"vmversion":0,"code":"0061736d010000000180022860000060037f7f7f01...# eosio <= eosio::setabi {"account":"eosio.token","abi":"0e656f73696f3a3a6162692f312e320008076163636f756e7400010762616c616e63...warning: transaction executed locally, but may not be confirmed by the network yet ]
now — eosio.msig
cleos set contract eosio.msig ~/eosio.contracts/build/contracts/eosio.msigwhich should result in:
Reading WASM from /home/ubuntu/eosio.contracts/build/contracts/eosio.msig/eosio.msig.wasm...Publishing contract...executed transaction: 830bb1a4e2a1f1747618f85416c479724bcb137030573066163f638ee4281d3d 23256 bytes 3224 us# eosio <= eosio::setcode {"account":"eosio.msig","vmtype":0,"vmversion":0,"code":"0061736d0100000001b8022f60000060037f7f7f017...# eosio <= eosio::setabi {"account":"eosio.msig","abi":"0e656f73696f3a3a6162692f312e32001006616374696f6e0004076163636f756e740...warning: transaction executed locally, but may not be confirmed by the network yet ]
Now we can create and allocate SYS tokens:
cleos push action eosio.token create '[ "eosio", "10000000000.0000 SYS" ]' -p eosio.token@activethis will create SYS token with max. supply of 10000000000.0000 SYS. The output should look like this:
executed transaction: 808b5ce23b22dcde5ccf6a9554cb30165f51eb071d3e2eaa73f20d98dde7beb1 120 bytes 297 us# eosio.token <= eosio.token::create {"issuer":"eosio","maximum_supply":"10000000000.0000 SYS"}warning: transaction executed locally, but may not be confirmed by the network yet ]
After creating SYS tokens we can issue them:
cleos push action eosio.token issue '[ "eosio", "1000000000.0000 SYS", "memo" ]' -p eosio@activethe output should look like this:
executed transaction: 48f032dbd12b23e5e2794c0869c2a24c48b8065059df597df191f0673d6a2da4 128 bytes 203 us# eosio.token <= eosio.token::issue {"to":"eosio","quantity":"1000000000.0000 SYS","memo":"memo"}warning: transaction executed locally, but may not be confirmed by the network yet ]
Let’s resume deploying system contracts:
According to EOSIO docs,
All of the protocol upgrade features introduced in v1.8 and on subsequent versions require a special protocol feature (codenamed
PREACTIVATE_FEATURE) to be activated and for an updated version of the system contract that makes use of the functionality introduced by that feature to be deployed.
So, let’s activate it:
curl --request POST \
    --url http://127.0.0.1:8888/v1/producer/schedule_protocol_feature_activations \
    -d '{"protocol_features_to_activate": ["0ec7e080177b2c02b278d5088611686b49d739925a92d9bfcacd7fc6b74053bd"]}'
you should get a simple response:
{"result":"ok"Now, set the eosio.boot contract. First — move to ~/source/eos/contracts/contracts/eosio.boot/build/ create eosio.boot and copy wasm and abi files there:
cd ~/source/eos/contracts/contracts/eosio.boot/build/
mkdir eosio.boot
cp eosio.boot.abi eosio.boot
cp eosio.boot.wasm eosio.boot
cd eosio.boot/
ls
after verifying that both files are there, you can run:
cleos set contract eosio ~/source/eos/contracts/contracts/eosio.boot/build/eosio.bootthe result will look like this:
Reading WASM from /home/ubuntu/source/eos/contracts/contracts/eosio.boot/build/eosio.boot/eosio.boot.wasm...Publishing contract...executed transaction: 05f778a5c6f66d385f78c17f765966b3edf01f64da84b8e1b8e8d797c47e03db 2752 bytes 644 us# eosio <= eosio::setcode {"account":"eosio","vmtype":0,"vmversion":0,"code":"0061736d01000000013e0c60000060027f7f0060017e0060...# eosio <= eosio::setabi {"account":"eosio","abi":"0e656f73696f3a3a6162692f312e32001008616374697661746500010e666561747572655f...
Now let’s activate all of the recommended protocol features:
# KV_DATABASE
cleos push action eosio activate '["825ee6288fb1373eab1b5187ec2f04f6eacb39cb3a97f356a07c91622dd61d16"]' -p eosio

# ACTION_RETURN_VALUE
cleos push action eosio activate '["c3a6138c5061cf291310887c0b5c71fcaffeab90d5deb50d3b9e687cead45071"]' -p eosio

# CONFIGURABLE_WASM_LIMITS
cleos push action eosio activate '["bf61537fd21c61a60e542a5d66c3f6a78da0589336868307f94a82bccea84e88"]' -p eosio

# BLOCKCHAIN_PARAMETERS
cleos push action eosio activate '["5443fcf88330c586bc0e5f3dee10e7f63c76c00249c87fe4fbf7f38c082006b4"]' -p eosio

# GET_SENDER
cleos push action eosio activate '["f0af56d2c5a48d60a4a5b5c903edfb7db3a736a94ed589d0b797df33ff9d3e1d"]' -p eosio

# FORWARD_SETCODE
cleos push action eosio activate '["2652f5f96006294109b3dd0bbde63693f55324af452b799ee137a81a905eed25"]' -p eosio

# ONLY_BILL_FIRST_AUTHORIZER
cleos push action eosio activate '["8ba52fe7a3956c5cd3a656a3174b931d3bb2abb45578befc59f283ecd816a405"]' -p eosio

# RESTRICT_ACTION_TO_SELF
cleos push action eosio activate '["ad9e3d8f650687709fd68f4b90b41f7d825a365b02c23a636cef88ac2ac00c43"]' -p eosio

# DISALLOW_EMPTY_PRODUCER_SCHEDULE
cleos push action eosio activate '["68dcaa34c0517d19666e6b33add67351d8c5f69e999ca1e37931bc410a297428"]' -p eosio

 # FIX_LINKAUTH_RESTRICTION
cleos push action eosio activate '["e0fb64b1085cc5538970158d05a009c24e276fb94e1a0bf6a528b48fbc4ff526"]' -p eosio

 # REPLACE_DEFERRED
cleos push action eosio activate '["ef43112c6543b88db2283a2e077278c315ae2c84719a8b25f25cc88565fbea99"]' -p eosio

# NO_DUPLICATE_DEFERRED_ID
cleos push action eosio activate '["4a90c00d55454dc5b059055ca213579c6ea856967712a56017487886a4d4cc0f"]' -p eosio

# ONLY_LINK_TO_EXISTING_PERMISSION
cleos push action eosio activate '["1a99a59d87e06e09ec5b028a9cbb7749b4a5ad8819004365d02dc4379a8b7241"]' -p eosio

# RAM_RESTRICTIONS
cleos push action eosio activate '["4e7bf348da00a945489b2a681749eb56f5de00b900014e137ddae39f48f69d67"]' -p eosio

# WEBAUTHN_KEY
cleos push action eosio activate '["4fca8bd82bbd181e714e283f83e1b45d95ca5af40fb89ad3977b653c448f78c2"]' -p eosio

# WTMSIG_BLOCK_SIGNATURES
cleos push action eosio activate '["299dcb6af692324b899b39f16d5a530a33062804e41f09dc97e9f156b4476707"]' -p eosio
and finally, let’s deploy eosio.system contract:
cleos set contract eosio ~/eosio.contracts/build/contracts/eosio.systemthe output should look like this:
Reading WASM from /home/ubuntu/eosio.contracts/build/contracts/eosio.system/eosio.system.wasm...Publishing contract...executed transaction: af2fad9a9b7d807c7a299667073a6f720b22c6c6b0d207a059af6fac56e0bc80 89832 bytes 11252 us# eosio <= eosio::setcode {"account":"eosio","vmtype":0,"vmversion":0,"code":"0061736d010000000193044a60000060037f7f7f017f6003...# eosio <= eosio::setabi {"account":"eosio","abi":"0e656f73696f3a3a6162692f312e320117626c6f636b5f7369676e696e675f617574686f72...
Let’s have a look at the genesis node logs:
tail -f ~/eos/genesis/blockchain/nodeos.logIf you didn’t break anything, you should see node running and producing blocks 😀
As a result, we have
- A single block producer running and producing blocks
- HTTP API exposed on 127.0.0.1:8888
let’s verify that everything is fine:
cleos get info should output something similar:
{"server_version": "26a4d285","chain_id": "15cc2a4b6ffe0d0cb878e6bc13eb8e8cb559a744436502ad984940a80ea98e50","head_block_num": 10177,"last_irreversible_block_num": 10176,"last_irreversible_block_id": "000027c025ff3f66ea647dc696b5a438f8ae27cf9040910bd29cff628fe4feee","head_block_id": "000027c12f76f01ec8d45c513e1992d8ba27e05ed3cc9b0a4e383581e5df102d","head_block_time": "2022-02-06T23:45:57.500","head_block_producer": "eosio","virtual_block_cpu_limit": 100000000,"virtual_block_net_limit": 1048576000,"block_cpu_limit": 99900,"block_net_limit": 1048576,"server_version_string": "v2.1.0","fork_db_head_block_num": 10177,"fork_db_head_block_id": "000027c12f76f01ec8d45c513e1992d8ba27e05ed3cc9b0a4e383581e5df102d","server_full_version_string": "v2.1.0-26a4d285d0be1052d962149e431eb81500782991","last_irreversible_block_time": "2022-02-06T23:45:57.000"}
Almost perfect (couple more hours till perfection 😀 )
Step 8: Take a break, let’s see our blockchain in action
Let’s expose our node to the public. Again — this is just for fun — I don’t recommend exposing the producer node to the public.
Let’s stop nodeos , tweak start.sh script a bit and start it again:
cd ~/eos/genesis
./stop.sh
nano start.sh
find http-server-address , p2p-listen-endpoint and update the values to
--http-server-address 0.0.0.0:8888 \
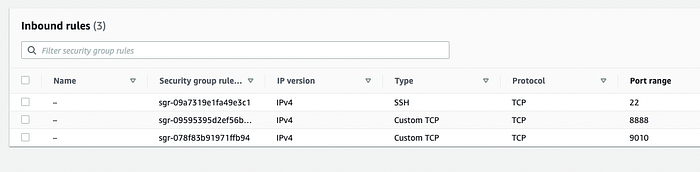
--p2p-listen-endpoint 0.0.0.0:9010 \Also, if you’re using AWS, make sure your security group’s inbound rules allow connections on ports 8888 and 9010.
Now, open your favorite EOS wallet (Anchor 😀 ) and set up a new chain:

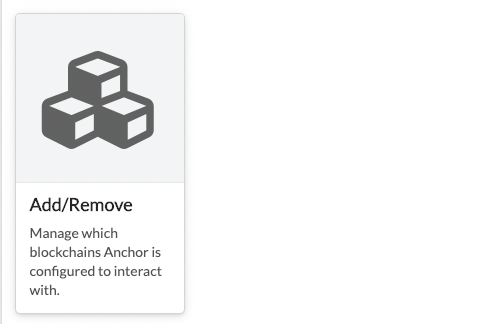
Then, click Add/Remove:
and Custom Blockchain:

Fill out the form:
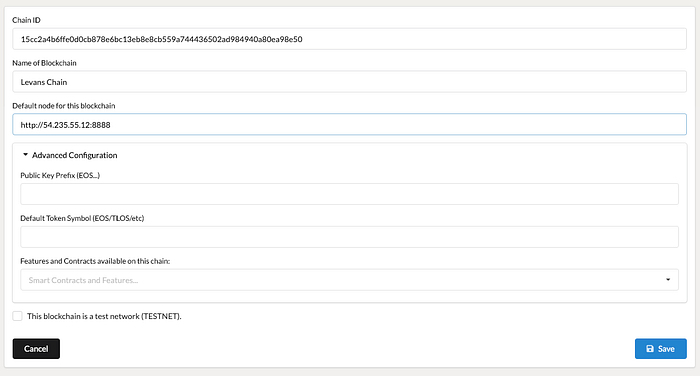
Chain ID — is the chain_id we got after running cleos get info . Default node for this blockchain = <public IP of your node>:8888 (or the port you specified in http-server-address parameter).
Hit Save and enable your chain in the list.

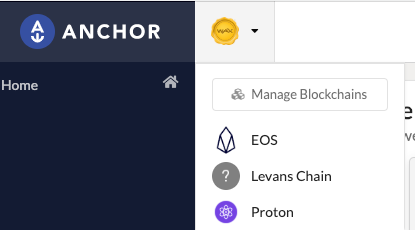
Save by clicking Enable Chains at the beginning of the list. Now in the chains’ dropdown, you should see your chain. Click on it and you’ll be connected:
At this moment we don’t have any accounts or tokens to play with. But first, let’s make sure our blockchain doesn’t have only one block producer.
Back to the terminal 😀
Step 9: Single node is not enough — go multinode
Right now we are running a single node with eosio signing all the blocks. Let’s make sure we have multiple producer nodes
Unlock the wallet and run the command:
cleos push action eosio setpriv '["eosio.msig", 1]' -p eosio@activeNow we have two privileged accounts — eosio and eosio.msig
Initialize system account with
cleos push action eosio init '["0", "4,SYS"]' -p eosio@activeNow let’s create new accounts, buy RAM and stake tokens. First, generate new keypairs:
cleos create key --to-consoleimport private key (console output) into the wallet:
cleos wallet importand then create a new account producer1 associated with the public key EOS6B41Z7SuCryZiyHXxKN6QnVELBQvnoAu1CZJ7zxZWuTNWcKEWX (don’t forget to replace this with the public key you generated in the previous step), stake 100000000 SYS tokens for CPU and NET and buy 8192 kb RAM. Of course, you can use a different name 😆
cleos system newaccount eosio --transfer producer1 EOS6B41Z7SuCryZiyHXxKN6QnVELBQvnoAu1CZJ7zxZWuTNWcKEWX --stake-net "100000000.0000 SYS" --stake-cpu "100000000.0000 SYS" --buy-ram-kbytes 8192and then create a new account producer1 associated with the public key EOS6B41Z7SuCryZiyHXxKN6QnVELBQvnoAu1CZJ7zxZWuTNWcKEWX (don’t forget to replace this with the public key you generated in the previous step), stake 100000000 SYS tokens for CPU and NET and buy 8192 kb RAM. Of course, you can use a different name 😆
cleos system newaccount eosio --transfer producer1 EOS6B41Z7SuCryZiyHXxKN6QnVELBQvnoAu1CZJ7zxZWuTNWcKEWX --stake-net "100000000.0000 SYS" --stake-cpu "100000000.0000 SYS" --buy-ram-kbytes 8192the output should look like this:
executed transaction: d711ac95f7b9a70da7df27e710dd55866390ee3a0e42d18cf2e5c5279c360819 336 bytes 554 us# eosio <= eosio::newaccount {"creator":"eosio","name":"producer1","owner":{"threshold":1,"keys":[{"key":"EOS6B41Z7SuCryZiyHXxKN6...# eosio <= eosio::buyrambytes {"payer":"eosio","receiver":"producer1","bytes":8388608}# eosio <= eosio::delegatebw {"from":"eosio","receiver":"producer1","stake_net_quantity":"100000000.0000 SYS","stake_cpu_quantity...# eosio.token <= eosio.token::transfer {"from":"eosio","to":"eosio.ram","quantity":"122.0851 SYS","memo":"buy ram"}# eosio.token <= eosio.token::transfer {"from":"eosio","to":"eosio.ramfee","quantity":"0.6135 SYS","memo":"ram fee"}# eosio <= eosio.token::transfer {"from":"eosio","to":"eosio.ram","quantity":"122.0851 SYS","memo":"buy ram"}# eosio.ram <= eosio.token::transfer {"from":"eosio","to":"eosio.ram","quantity":"122.0851 SYS","memo":"buy ram"}# eosio <= eosio.token::transfer {"from":"eosio","to":"eosio.ramfee","quantity":"0.6135 SYS","memo":"ram fee"}# eosio.ramfee <= eosio.token::transfer {"from":"eosio","to":"eosio.ramfee","quantity":"0.6135 SYS","memo":"ram fee"}# eosio.token <= eosio.token::transfer {"from":"eosio","to":"eosio.stake","quantity":"200000000.0000 SYS","memo":"stake bandwidth"}# eosio <= eosio.token::transfer {"from":"eosio","to":"eosio.stake","quantity":"200000000.0000 SYS","memo":"stake bandwidth"}# eosio.stake <= eosio.token::transfer {"from":"eosio","to":"eosio.stake","quantity":"200000000.0000 SYS","memo":"stake bandwidth"}
Now, you can run the following command and see our newly created account:
cleos get account producer1the result looks like this:
created: 2022-02-07T00:24:37.500permissions:owner     1:    1 EOS6B41Z7SuCryZiyHXxKN6QnVELBQvnoAu1CZJ7zxZWuTNWcKEWX
active     1:    1 EOS6B41Z7SuCryZiyHXxKN6QnVELBQvnoAu1CZJ7zxZWuTNWcKEWXmemory:quota:     8.001 MiB    used:     3.475 KiBnet bandwidth:staked:  100000000.0000 SYS           (total stake delegated from account to self)
delegated:       0.0000 SYS           (total staked delegated to account from others)
used:                 0 bytes
available:        164.8 TiB
limit:            164.8 TiBcpu bandwidth:staked:  100000000.0000 SYS           (total stake delegated from account to self)
delegated:       0.0000 SYS           (total staked delegated to account from others)
used:                 0 us
available:         4800 hr
limit:             4800 hr
LOOOOOOOTS of resources. Nice.
Now we can register producer1 as a block producer:
cleos system regproducer producer1 EOS6B41Z7SuCryZiyHXxKN6QnVELBQvnoAu1CZJ7zxZWuTNWcKEWX https://levan.dev/producer1(again, don’t forget to change the public key. I won’t remind you again 😝 ) The result should look like this:
executed transaction: 0145a2c5318e5b69c92b23f6153e3985a4e4892baaa46d7bde73b72871a24fd4 168 bytes 219 us# eosio <= eosio::regproducer {"producer":"producer1","producer_key":"EOS6B41Z7SuCryZiyHXxKN6QnVELBQvnoAu1CZJ7zxZWuTNWcKEWX","url"...warning: transaction executed locally, but may not be confirmed by the network yet ]
This doesn’t mean that producer1 is already a producer. It’s just a candidate for now.
Let’s create producer2 too — with a different key. All we need to do is repeat last few steps — create new keypair, import it in the wallet, create new account with resources and register it as a producer. After registering producer2 , you can run:
cleos system listproducersand see the following output:
Producer Producer key Url Scaled votesproducer1 EOS6B41Z7SuCryZiyHXxKN6QnVELBQvnoAu1CZJ7zxZWuTNWcKEWX https://levan.dev/producer1 0.0000producer2 EOS8LwVvgx2Ais7t69zKFJLDBCuMbsSJP1X7a4ndRtHZx41sgJJZT https://levan.dev/producer2 0.0000
Now it’s time to set up node for producer1 :
cd ~/eos
mkdir producer1
cd producer1/
Note before proceeding: make sure that PRODUCER_PUB_KEY and PRODUCER_PRIV_KEY are properly set in all files.
Create genesis_start.sh
nano genesis_start.shand paste the following content:
#!/bin/bash
DATADIR="./blockchain"
CURRENTDIR=${PWD##*/}
PRODUCER_PUB_KEY=""
PRODUCER_PRIV_KEY=""
HTTP_PORT=8011
P2P_PORT=9011if [ ! -d $DATADIR ]; then
  mkdir -p $DATADIR;
fi

nodeos \
--genesis-json $DATADIR"/../../genesis.json" \
--signature-provider $PRODUCER_PUB_KEY=KEY:$PRODUCER_PRIV_KEY \
--plugin eosio::producer_plugin \
--plugin eosio::producer_api_plugin \
--plugin eosio::chain_plugin \
--plugin eosio::chain_api_plugin \
--plugin eosio::http_plugin \
--plugin eosio::history_api_plugin \
--plugin eosio::history_plugin \
--data-dir $DATADIR"/data" \
--blocks-dir $DATADIR"/blocks" \
--config-dir $DATADIR"/config" \
--producer-name $CURRENTDIR \
--http-server-address 127.0.0.1:$HTTP_PORT \
--p2p-listen-endpoint 127.0.0.1:$P2P_PORT \
--access-control-allow-origin=* \
--contracts-console \
--http-validate-host=false \
--verbose-http-errors \
--enable-stale-production \
--p2p-peer-address localhost:9010 \
--p2p-peer-address localhost:9012 \
>> $DATADIR"/nodeos.log" 2>&1 & \
echo $! > $DATADIR"/eosd.pid"
also, create start.sh with content
#!/bin/bash
DATADIR="./blockchain"
CURRENTDIR=${PWD##*/}
PRODUCER_PUB_KEY=""
PRODUCER_PRIV_KEY=""
HTTP_PORT=8011
P2P_PORT=9011if [ ! -d $DATADIR ]; then
  mkdir -p $DATADIR;
fi

nodeos \
--signature-provider $PRODUCER_PUB_KEY=KEY:$PRODUCER_PRIV_KEY \
--plugin eosio::producer_plugin \
--plugin eosio::producer_api_plugin \
--plugin eosio::chain_plugin \
--plugin eosio::chain_api_plugin \
--plugin eosio::http_plugin \
--plugin eosio::history_api_plugin \
--plugin eosio::history_plugin \
--data-dir $DATADIR"/data" \
--blocks-dir $DATADIR"/blocks" \
--config-dir $DATADIR"/config" \
--producer-name $CURRENTDIR \
--http-server-address 127.0.0.1:$HTTP_PORT \
--p2p-listen-endpoint 127.0.0.1:$P2P_PORT \
--access-control-allow-origin=* \
--contracts-console \
--http-validate-host=false \
--verbose-http-errors \
--enable-stale-production \
--p2p-peer-address localhost:9010 \
--p2p-peer-address localhost:9012 \
>> $DATADIR"/nodeos.log" 2>&1 & \
echo $! > $DATADIR"/eosd.pid"
and hard_start.sh with content
#!/bin/bash
DATADIR="./blockchain"
CURRENTDIR=${PWD##*/}
PRODUCER_PUB_KEY=""
PRODUCER_PRIV_KEY=""
HTTP_PORT=8011
P2P_PORT=9011if [ ! -d $DATADIR ]; then
  mkdir -p $DATADIR;
fi

nodeos \
--signature-provider $PRODUCER_PUB_KEY=KEY:$PRODUCER_PRIV_KEY \
--plugin eosio::producer_plugin \
--plugin eosio::producer_api_plugin \
--plugin eosio::chain_plugin \
--plugin eosio::chain_api_plugin \
--plugin eosio::http_plugin \
--plugin eosio::history_api_plugin \
--plugin eosio::history_plugin \
--data-dir $DATADIR"/data" \
--blocks-dir $DATADIR"/blocks" \
--config-dir $DATADIR"/config" \
--producer-name $CURRENTDIR \
--http-server-address 127.0.0.1:$HTTP_PORT \
--p2p-listen-endpoint 127.0.0.1:$P2P_PORT \
--access-control-allow-origin=* \
--contracts-console \
--http-validate-host=false \
--verbose-http-errors \
--enable-stale-production \
--p2p-peer-address localhost:9010 \
--p2p-peer-address localhost:9012 \
--hard-replay-blockchain \
>> $DATADIR"/nodeos.log" 2>&1 & \
echo $! > $DATADIR"/eosd.pid"
We can re-use stop.sh and clear.sh scripts from our genesis folder:
cd ~/eos
cp genesis/clear.sh producer1/
cp genesis/stop.sh producer1/
Now, repeat the same steps and create directory for producer2 . Another important node — make sure you set ports and peer addresses correctly — producer2 should run on HTTP_PORT 8012 and P2P_PORT 9012 , and it should peer with localhost:9010 and localhost:9011
Let’s chmod our executables:
cd ~/eos
chmod 755 producer1/*.sh
chmod 755 producer2/*.sh
and start them!
cd producer1/
./genesis_start.sh
tail -f blockchain/nodeos.log
you’ll see that your node will syncronize with genesis node
...
info  2022-02-07T01:17:31.040 net-1     net_plugin.cpp:1717           operator()           ] requesting range 102 to 201, from ip-172-31-85-179:9010 - c447998info  2022-02-07T01:17:31.067 net-0     net_plugin.cpp:1717           operator()           ] requesting range 202 to 301, from ip-172-31-85-179:9010 - c447998info  2022-02-07T01:17:31.094 net-1     net_plugin.cpp:1717           operator()           ] requesting range 302 to 401, from ip-172-31-85-179:9010 - c447998
...
and then starts receiving blocks
...info 2022-02-07T01:19:09.901 nodeos producer_plugin.cpp:421 on_incoming_block ] Received block bfcf246bf66877f3... #21231 @ 2022-02-07T01:19:10.000 signed by eosio [trxs: 0, lib: 21230, conf: 0, latency: -98 ms]...
We can stop producer1 node by running
cd ~/eos/producer1/
./stop.sh
and if you want to start it again — DO NOT use genesis_start.sh , use start.sh
Let’s start producer2 as well:
cd ~/eos/producer2
./genesis_start.sh
Now we have 3 nodes running 🤘
Lets now vote for our producer1 and producer2 . First, let’s vote from producer1 account:
cleos system voteproducer prods producer1 producer1 producer2now, from producer2 account:
cleos system voteproducer prods producer2 producer1 producer2Perfect. If you check producer list by running cleos system listproducers , you should see the following output:
Producer Producer key Url Scaled votesproducer1 EOS6B41Z7SuCryZiyHXxKN6QnVELBQvnoAu1CZJ7zxZWuTNWcKEWX https://levan.dev/producer1 0.5000producer2 EOS8LwVvgx2Ais7t69zKFJLDBCuMbsSJP1X7a4ndRtHZx41sgJJZT https://levan.dev/producer2 0.5000
Now we can resign eosio account and leave only one privileged — eosio.msig account :
cleos push action eosio updateauth '{"account": "eosio", "permission": "owner", "parent": "", "auth": {"threshold": 1, "keys": [], "waits": [], "accounts": [{"weight": 1, "permission": {"actor": "eosio.prods", "permission": "active"}}]}}' -p eosio@ownercleos push action eosio updateauth '{"account": "eosio", "permission": "active", "parent": "owner", "auth": {"threshold": 1, "keys": [], "waits": [], "accounts": [{"weight": 1, "permission": {"actor": "eosio.prods", "permission": "active"}}]}}' -p eosio@active
and also do the same for all system accounts we created previously — here’s the list:
eosio.bpay
eosio.msig
eosio.names
eosio.ram
eosio.ramfee
eosio.saving
eosio.stake
eosio.token
eosio.vpay
eosio.rex
and here are the commands:
cleos push action eosio updateauth '{"account": "eosio.bpay", "permission": "owner", "parent": "", "auth": {"threshold": 1, "keys": [], "waits": [], "accounts": [{"weight": 1, "permission": {"actor": "eosio", "permission": "active"}}]}}' -p eosio.bpay@ownercleos push action eosio updateauth '{"account": "eosio.bpay", "permission": "active", "parent": "owner", "auth": {"threshold": 1, "keys": [], "waits": [], "accounts": [{"weight": 1, "permission": {"actor": "eosio", "permission": "active"}}]}}' -p eosio.bpay@active

cleos push action eosio updateauth '{"account": "eosio.msig", "permission": "owner", "parent": "", "auth": {"threshold": 1, "keys": [], "waits": [], "accounts": [{"weight": 1, "permission": {"actor": "eosio", "permission": "active"}}]}}' -p eosio.msig@ownercleos push action eosio updateauth '{"account": "eosio.msig", "permission": "active", "parent": "owner", "auth": {"threshold": 1, "keys": [], "waits": [], "accounts": [{"weight": 1, "permission": {"actor": "eosio", "permission": "active"}}]}}' -p eosio.msig@active

cleos push action eosio updateauth '{"account": "eosio.names", "permission": "owner", "parent": "", "auth": {"threshold": 1, "keys": [], "waits": [], "accounts": [{"weight": 1, "permission": {"actor": "eosio", "permission": "active"}}]}}' -p eosio.names@ownercleos push action eosio updateauth '{"account": "eosio.names", "permission": "active", "parent": "owner", "auth": {"threshold": 1, "keys": [], "waits": [], "accounts": [{"weight": 1, "permission": {"actor": "eosio", "permission": "active"}}]}}' -p eosio.names@active

cleos push action eosio updateauth '{"account": "eosio.ram", "permission": "owner", "parent": "", "auth": {"threshold": 1, "keys": [], "waits": [], "accounts": [{"weight": 1, "permission": {"actor": "eosio", "permission": "active"}}]}}' -p eosio.ram@ownercleos push action eosio updateauth '{"account": "eosio.ram", "permission": "active", "parent": "owner", "auth": {"threshold": 1, "keys": [], "waits": [], "accounts": [{"weight": 1, "permission": {"actor": "eosio", "permission": "active"}}]}}' -p eosio.ram@active

cleos push action eosio updateauth '{"account": "eosio.ramfee", "permission": "owner", "parent": "", "auth": {"threshold": 1, "keys": [], "waits": [], "accounts": [{"weight": 1, "permission": {"actor": "eosio", "permission": "active"}}]}}' -p eosio.ramfee@ownercleos push action eosio updateauth '{"account": "eosio.ramfee", "permission": "active", "parent": "owner", "auth": {"threshold": 1, "keys": [], "waits": [], "accounts": [{"weight": 1, "permission": {"actor": "eosio", "permission": "active"}}]}}' -p eosio.ramfee@active

cleos push action eosio updateauth '{"account": "eosio.saving", "permission": "owner", "parent": "", "auth": {"threshold": 1, "keys": [], "waits": [], "accounts": [{"weight": 1, "permission": {"actor": "eosio", "permission": "active"}}]}}' -p eosio.saving@ownercleos push action eosio updateauth '{"account": "eosio.saving", "permission": "active", "parent": "owner", "auth": {"threshold": 1, "keys": [], "waits": [], "accounts": [{"weight": 1, "permission": {"actor": "eosio", "permission": "active"}}]}}' -p eosio.saving@active

cleos push action eosio updateauth '{"account": "eosio.stake", "permission": "owner", "parent": "", "auth": {"threshold": 1, "keys": [], "waits": [], "accounts": [{"weight": 1, "permission": {"actor": "eosio", "permission": "active"}}]}}' -p eosio.stake@ownercleos push action eosio updateauth '{"account": "eosio.stake", "permission": "active", "parent": "owner", "auth": {"threshold": 1, "keys": [], "waits": [], "accounts": [{"weight": 1, "permission": {"actor": "eosio", "permission": "active"}}]}}' -p eosio.stake@active

cleos push action eosio updateauth '{"account": "eosio.token", "permission": "owner", "parent": "", "auth": {"threshold": 1, "keys": [], "waits": [], "accounts": [{"weight": 1, "permission": {"actor": "eosio", "permission": "active"}}]}}' -p eosio.token@ownercleos push action eosio updateauth '{"account": "eosio.token", "permission": "active", "parent": "owner", "auth": {"threshold": 1, "keys": [], "waits": [], "accounts": [{"weight": 1, "permission": {"actor": "eosio", "permission": "active"}}]}}' -p eosio.token@active

cleos push action eosio updateauth '{"account": "eosio.vpay", "permission": "owner", "parent": "", "auth": {"threshold": 1, "keys": [], "waits": [], "accounts": [{"weight": 1, "permission": {"actor": "eosio", "permission": "active"}}]}}' -p eosio.vpay@ownercleos push action eosio updateauth '{"account": "eosio.vpay", "permission": "active", "parent": "owner", "auth": {"threshold": 1, "keys": [], "waits": [], "accounts": [{"weight": 1, "permission": {"actor": "eosio", "permission": "active"}}]}}' -p eosio.vpay@active
Now if you run
cleos get infomultiple times, you’ll see that some blocks are produced by producer1 , some— by producer2
{"server_version": "26a4d285","chain_id": "15cc2a4b6ffe0d0cb878e6bc13eb8e8cb559a744436502ad984940a80ea98e50","head_block_num": 22785,"last_irreversible_block_num": 22770,"last_irreversible_block_id": "000058f2ae5331d7854b269d0b1b500cdcbb88168e1713855a1c629f35e35351","head_block_id": "00005901bdf2154d473d039b4d716b311ddb542b4d000ac4306eb74e6fe3efac","head_block_time": "2022-02-07T01:32:07.000","head_block_producer": "producer2", <--------------------------"virtual_block_cpu_limit": 100000000,"virtual_block_net_limit": 1048576000,"block_cpu_limit": 99900,"block_net_limit": 1048576,"server_version_string": "v2.1.0","fork_db_head_block_num": 22785,"fork_db_head_block_id": "00005901bdf2154d473d039b4d716b311ddb542b4d000ac4306eb74e6fe3efac","server_full_version_string": "v2.1.0-26a4d285d0be1052d962149e431eb81500782991","last_irreversible_block_time": "2022-02-07T01:31:59.500"}
__
{"server_version": "26a4d285","chain_id": "15cc2a4b6ffe0d0cb878e6bc13eb8e8cb559a744436502ad984940a80ea98e50","head_block_num": 22798,"last_irreversible_block_num": 22782,"last_irreversible_block_id": "000058feff76ef3a66310085bac57d423c653dce558c18bf5e9c2c5613d76445","head_block_id": "0000590e61e5c741e1a1b48ed0509061f079fcd4fbbc54b264502cfdec583f72","head_block_time": "2022-02-07T01:32:13.500","head_block_producer": "producer1", <--------------------------"virtual_block_cpu_limit": 100000000,"virtual_block_net_limit": 1048576000,"block_cpu_limit": 99900,"block_net_limit": 1048576,"server_version_string": "v2.1.0","fork_db_head_block_num": 22798,"fork_db_head_block_id": "0000590e61e5c741e1a1b48ed0509061f079fcd4fbbc54b264502cfdec583f72","server_full_version_string": "v2.1.0-26a4d285d0be1052d962149e431eb81500782991","last_irreversible_block_time": "2022-02-07T01:32:05.500"}
Step 10: Now what?
Now we have private EOS network running with two block producers and you know how you can set up nodes. Now let’s create few accounts, issue custom token, import all of this in Anchor and send them
Generate new keypair:
cleos create key --to-consolePrivate key: 5JFWM62D6bgoVh6gyMJwRpHVNCjPRviqx1sYyoZg1b8r3dWZj2u
Public key: EOS767B7FxjMNiUiht95ZCnYBtCUZiMTsYua3hR4XR8DqxkyRMYCr
now import this private key in our default wallet using:
cleos wallet import Next, create new account with our public key and give it some resources:
cleos system newaccount eosio --transfer foobartokens EOS767B7FxjMNiUiht95ZCnYBtCUZiMTsYua3hR4XR8DqxkyRMYCr --stake-net "100000000.0000 SYS" --stake-cpu "100000000.0000 SYS" --buy-ram-kbytes 8192Remember that contracts we had built? Let’s set eosio.token contract for our foobartokens account.
cleos set contract foobartokens ~/eosio.contracts/build/contracts/eosio.token/Now, create new token — let’s call it BAR and set max.supply to 1000000000.0000 BAR:
cleos push action foobartokens create '[ "foobartokens", "1000000000.0000 BAR"]' -p foobartokensIssue our shiny BAR tokens:
cleos push action foobartokens issue '[ "foobartokens", "1000000000.0000 BAR", "Issued BAR Tokens!"]' -p foobartokensLet’s create accounts levan and toby (generate new keys for each)
cleos system newaccount eosio --transfer levan EOS6XNwKxBdDwv6TFyduRsdBDfcqikZy8fA72XpQwQo8pd9jhFCzY --stake-net "100000.0000 SYS" --stake-cpu "100000.0000 SYS" --buy-ram-kbytes 8192cleos system newaccount eosio --transfer toby EOS5N7LbpTwkpsJRwrhJ7j8yvo1jm9UcqUmQD2wphQVUPAQtaVcUV --stake-net "100000.0000 SYS" --stake-cpu "100000.0000 SYS" --buy-ram-kbytes 8192
and transfer some BAR tokens to account levan :
cleos push action foobartokens transfer '["foobartokens", "levan", "100000.0000 BAR", "Welcome!"]' -p foobartokens@ownerThat’s it. We’re done with the terminal, let’s move to Anchor:
First, import toby and levan in Anchor wallet:
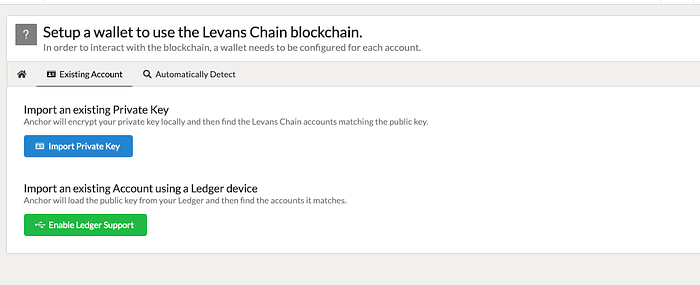
Hit Import Private Key and import levan and toby ‘s private keys.
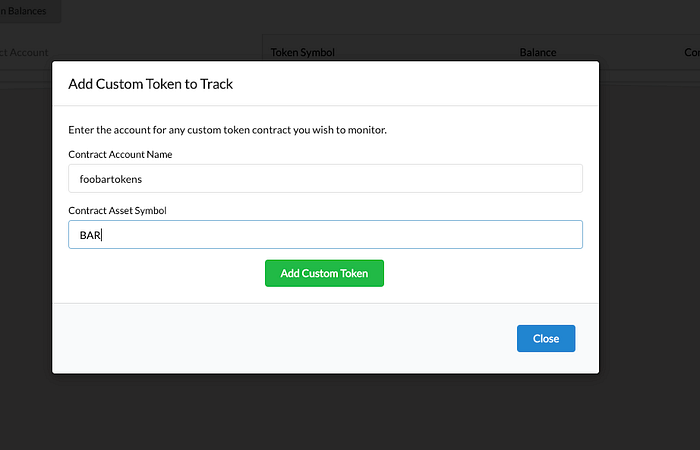
Next, track our BAR token — go to Tokens , click Manage Tracked Tokens and Add Custom Token
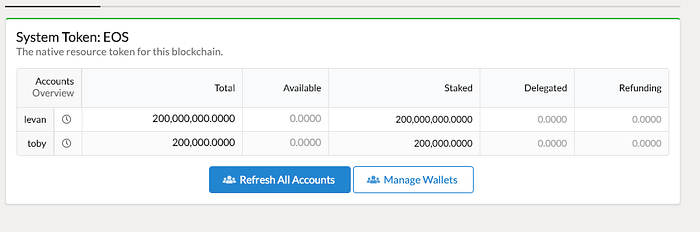
Now return to Tokens tab and you’ll see those 100 000 BAR tokens we’ve sent to account levan

Let’s send some to Toby:
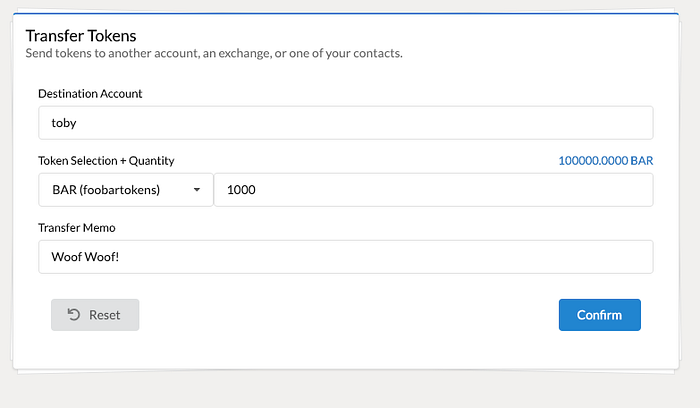
Woof Woof! because Toby is my Rottweiler 😆
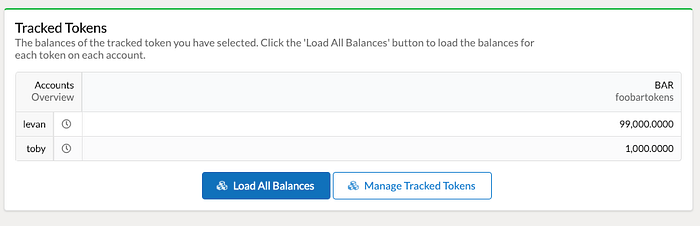
and here it is — Toby got his treats.
Conclusion
Congrats! Now you know how to set up your very own EOS private chain with multiple block producers, how to issue custom tokens, how to connect wallet and how to have fun with custom tokens.
In Part 2 of this article (yeah, it will have Part 2) we will set up Hyperion History API.
Updated: Private EOS Network: Part 2:Hyperion
Have fun 🤘
Reference(s):
EOSIO Docs — BIOS Boot Sequence: https://developers.eos.io/welcome/latest/tutorials/bios-boot-sequence/